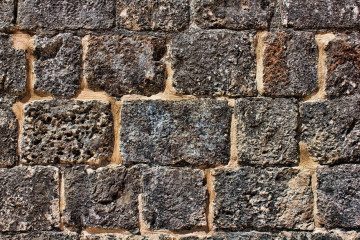
Trying to decide on a material for an external construction project? Why not go with stone masonry? No matter what project you’re working on, it’s a pretty solid investment. It’s been used in construction projects for centuries now, as far back as the middle ages. There are many reasons for that. Today, we’re going to go over just a few.
It’s Strong, Durable, and Easy To Maintain
Compared to materials like wood, masonry is far more solid. It won’t generally suffer too much from weather damage, and it’s more or less fireproof. As an added bonus, you can also install masonry firewalls and separation walls, and masonry resists common conditions which cause degradation, such as mould and termites. When used to shore up or strengthen existing construction systems, masonry is also an excellent choice. It’s well-suited to bear loads such as roofs and additional floors, and its solid nature means it won’t generally break or bend to heavy snows or wind shears. The face of masonry also tends to be visually attractive compared to other materials, and it generally doesn’t need paint.
It’s Flexible
Masonry pretty much goes with anything, and can be easily architected into a wide array of different designs. As a building material, it’s easy to manufacture, customize, and deliver. Masonry walls are also easy to adjust and modify, even after they’ve been erected.
It’s Inexpensive
Concrete masonry allows you to build and finish with one unit and one laying operation, and without requiring additional wall coverings. What’s more, because it can provide both the structure and interior or exterior finish of your building, you’ll see reduced construction costs. It’s an excellent insulator as well, leading to reduced heating costs, and using it in a building project can contribute to lower insurance rates.
It’s Green
For the environmentally-conscientious, masonry products tend to be less prone to waste during the manufacturing process. They emit no volatile organic compounds into the air when produced, and they don’t emit gases, require chemical maintenance, or leach chemical compounds. And while stone quarries do impact the environment to some extent, that impact is limited to the area of the quarry, and is strictly controlled. Lastly, masonry is easy to reuse and salvage in the event that you need to tear down a building
It Reduces Noise
The thickness and sturdiness of masonry means it’s quite well-suited for blocking out unwanted noise. For example, an apartment building constructed using masonry will offer excellent noise reduction, and allow its residents to go about their lives without worrying about being disturbed - or disturbing anyone else.
A Rich Legacy
Masonry has been used as a building material for thousands of years, and not without reason. As a material, it has a rich heritage across the world, and its sustainability makes it an attractive option, even today. Use it in your next project, and see for yourself.
You are here:
Home >
Blog
Tips for Chicago Homeowners
With over 20 years experience we've established significant knowledge in home maintenance. We want to share that knowledge with homeowners to make it easy for them to take care of their properties.
About Bald Eagle Construction

Our goal is to bring quality materials, experience and professionalism together and complete every project in a timely manner at a fair and competitive price.
Kevin Wood – Owner, Bald Eagle Construction
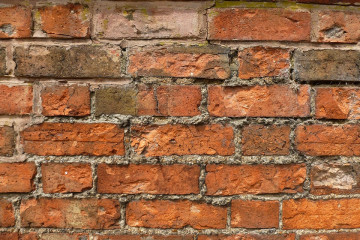
Brick makes for one of the most beautiful building exteriors available. The fact that it’s relatively durable and easy to maintain is yet another bonus - generally speaking, you don’t have to renovate brickwork as often as wood or cut stone. Still, every now and then, you’ll need to bust out the supplies for some fixes.
Most frequently, it’s the mortar holding brickwork together that gets worn out. Over time, it eventually starts to crack, recede, and spill from the joints between bricks. Left alone, it will eventually break altogether, causing the wall to collapse.
To prevent that from happening, you’ll want to bring out the trowel and chisel, and repoint. We’ll walk you through the process.
Step One: Get Your Materials Together
First, let’s go over what you’ll need:
A hammer
A flat utility chisel
Safety glasses and a dust mask
A whisk broom
A brick trowel
A pointing trowel
Mortar mix
A contouring tool
A wheel rake or jointer tool
(Optional) A 4 and a half inch diamond bladed angle grinder
Waterproof gloves
Step Two: Chip Out The Old Mortar
First, put on your mask and glasses. Using either your hammer and cold chisel or your utility chisel, remove about an inch of the old mortar. Depending on how deep the damaged mortar goes, you may have to keep chipping until you reach a solid base. Worst case scenario, you might have to remove the bricks and re-set them with new mortar. If you’re dealing with cracked mortar, you may need to make a relief cut with either your chisel or an angle grinder, following up by chipping out the mortar still attached to the bricks on either side. Brush out any loose particles that remain with your whisk broom before moving to the next step.
Step Three: Mix Your Mortar
Dump your mortar mix into a sizeable-enough container, then mix until it’s roughly the consistency of peanut butter. Allow it to ‘rest’ for ten minutes, then mix it again before you use it. Note that you should only mix small batches - mortar only tends to last for about thirty minutes or so before starting to dry out, and you can’t revitalize dried mortar just by adding water to it.
Step Four: Fill The Mortar Joints
Load a bit of mortar onto an overturned brick trowel, then use the trowel to push the mortar in between the bricks. Fill the horizontal segments first, before filling the verticals. Be careful that you don’t use too much mortar, or you might get it on the brick face - but make sure the mortar is also packed tightly. Additionally, deeper joints should be filled in two stages. After the first stage - and if you notice any irregularities - you can use a wheel rake or jointer to add more mortar and even it out.
Step Five: Push The Mortar In
With a pointing tool such as your pointer trowel, push the mortar in between the bricks. Once you’ve done this, scrape away any excess mortar on the bricks with your mortar brush.
Step Six: One Last Look
Once you’re finished, take a step back and make sure you haven’t missed anything. That’s it, you’re done!
Cleaning the roofing in Chicago homes can increase the curb appeal of your home. Regular maintenance will reduce or eliminate discolorations and streaks that make your relatively new roof look old and worn out. Cleaning will also help to remove mildew and moss that can damage your shingles.
What you’ll need to clean your roofing:
A bucket 1 gallon of hot water 1 cup of powdered laundry detergent 1 cup of chlorine bleach A garden hose A pump sprayer A stiff, natural-bristled broom A stir stick A ladder Rubber soled shoes Safety glasses Harness
**Mix: **Combine the bleach, detergent, and hot water in the bucket and stir with the stick until the detergent granules have dissolved. Then pour it into the garden sprayer.
**Wash: **Working in 3x10 ft. sections, spray the cleaning solution onto the roof. Let it stand for 10-15 minutes, then scrub the wet area using a broom if needed to remove dirt, moss, mold, or other debris. If the roof is drying off rapidly, continue spraying the mixture to keep the section wet while you’re working.
**Rinse: **Rinse each section with clean water as you finish scrubbing to avoid allowing the dirty water to dry on the roof.
**Repeat: **Repeat the process until the entire roof is clean.
Helpful Tips to help you when cleaning your roofing:
• The best time to clean shingles are cool, overcast days. This will ensure that the cleaner won’t dry as fast as you spray it on the roof.
• Always begin cleaning at the lower edge of the roof and work your way up. This will reduce your chances of slipping by allowing you to remain on a dry surface throughout the cleaning process.
• Always use a harness when working on your roof to avoid major injury in case you slip or fall.
• Wearing safety goggles will prevent the cleaning solution from blowing into your eyes, especially if you’re working on a breezy day, which is important to remember when working on roofing in Chicago.Taking the time to clean the roofing in Chicago houses will not only make increase your curb appeal, it will extend the life of your roof.
No matter how hard you try, oil stains on your concrete driveway are nearly impossible to avoid. There are several methods for cleaning these stains, though the size of the oil spill and length of time the stain has had to set will determine the process for removal.
All natural removal
If your spill is fresh, apply a liberal amount of cat litter onto the affected area of your concrete driveway and use a nylon-bristled brush to spread it evenly. Allow the litter to sit for at least one hour to absorb the spill. After the oil has completely absorbed into the litter, use a broom to sweep up the mess. You can also use a baking soda or dishwashing detergent bath to remove the stain. First, lightly wet the area with water and sprinkle a hefty amount of baking soda or dishwashing detergent and let it sit while you boil a large pot of water. When the water is boiling, pour it over the area and scrub with a stiff-bristled brush. When finished, rinse off the excess soap and repeat as necessary to achieve the desired results.
Tips:
Avoid using metal-bristled brushes on your concrete driveway; they can damage the surface, and if bristles get stuck in the driveway they can cause rust stains.
Keep a bag of litter or baking soda in the garage in case of a spill.
Pressure washers
Using a medium- to heavy-duty pressure washer can remove or lighten oil stains on your concrete driveway if the spill is relatively new. First, apply a commercial-grade cleaner to the oil stain and scrub with a brush or broom. Then add detergent to your pressure washer and begin spraying. Move at an even pace and keep the nozzle at the same distance from the surface of the concrete at all times to ensure that no streaking occurs. Allow the detergent to sit on the spot for five to ten minutes before rinsing for best results.
Tip:
Don’t add bleach to your pressure washer; it can damage some of the parts.
Chemical removers
A more aggressive method for removing larger stains on your concrete driveway involve a commercial concrete degreaser. These degreasers are a concentrated alkaline soap that loosens the oil from the concrete to permit easier removal. The problem with these products, however, is that they don’t work well on large spills or spills that have been sitting for a long period of time. Poultice is also an effective treatment for smaller stubborn stains. A poultice is a mixture of an absorbent material like cat litter and a strong solvent such as acetone that is smeared atop the stain. The mixture is then covered with plastic while the material sucks the stain out of the concrete.
Tips:
Wear protective clothing and eyewear when working with chemicals.
Keep small children and pets away from the area and keep the number to poison control handy in case any accidents occur.
For older stains, try using a TSP (trisodium phospate) or paint thinner such as turpentine.
Can masonry be recycled? With the rise of crafting sites like Pinterest, many people are re-purposing old materials, giving them new life. But recycling brick can be tricky. Below are a few tips and tricks for working with recycled masonry.
1. Use old brick to match historical facades.
Just as in mortar for tuckpointing, brick restoration projects often involve matching the color of the brick to create a uniform finished product. Many masonry contractors can locate matching bricks for you, but if you're interested in a DIY project, you can locate matching brick by searching for demolition projects in your area. You can often purchase older brick at a fraction of the cost of new brick.
Tip: Only buy recycled brick that has been inspected by a professional for integrity. Do not buy bricks that are cracked, or peeling excessively.
2. Make good use of bad brick.
There's no need to throw out all those old bricks if they aren't up to quality expectations. Brick can be crushed and used for as a landscape material. It makes a great addition to xeriscaping projects and keeps weeds from growing in your flowerbeds. It can also be ground into powder to make new bricks.
Tip: Contact local masons or brick manufacturers to buy brick chips. You can also find wholesale prices if you're buying in large quantities.
3. Use old brick for landscaping projects.
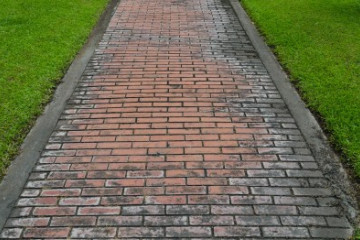
Walkways, patios, driveways, flowerbeds, fire pits and many other outdoor projects can be created using recycled brick. Often, old bricks are used to build outdoor brick ovens. The uses for brick in outdoor projecst are seemingly endless!
Tip: Brick is sturdy, and is rated by its frost resistant properties and soluble salt content. High frost resistance is important if you live in cold areas like Chicago where inclement winter weather is common.
With these tips and tricks for re-purposing old brick, you'll never have to wonder, "Can masonry be recycled?" again!
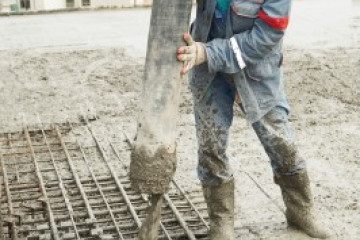
Laying concrete is a difficult process. This multi-step process can be exhausting and time consuming, and if the work isn't done properly, it can shorten the life of the project. Here are four good reasons to hire Chicago concrete contractors for your next project.
Laying concrete requires expensive tools
First, you'll need tools for building the forms to mold the concrete--hammers, portable saws, sledges, pry bars, etc. You'll also need to purchase shovels, hoes, power mixers, tampers, edgers,trowels, and cement brooms. Many people don’t realize that you need all this special equipment for concrete projects. These tools add a significant dollar amount to the cost of your project, resulting in expenses you may not have initially anticipated.
Working with concrete is physically demanding and time sensitive
Concrete is notoriously difficult to manipulate and is extraordinarily heavy (150 lbs. per cubic foot). Mixing and pouring concrete takes at least two people, and time is of the essence. If the concrete begins to set before it is smooth and level, the project may have to be deconstructed and started anew.
Mistakes can be costly
If your lack of knowledge concerning laying a concrete slab results in mistakes like the ones mentioned above, additional costs can be incurred. Additional tools and materials may be required to break down the flawed concrete before new concrete can be relaid. Hiring reputable Chicago concrete contractors if you are unfamiliar with laying concrete can save you time and money.
Warranties can save headaches if problems arise
For example, if your concrete foundation begins to crack or chip a few months after it's been poured, you'll have to make repairs. If you've laid the concrete yourself, these repairs can be costly, but many Chicago concrete contractors offer full guarantees and warranties that mitigate the costs of repairs if your concrete is damaged due to a construction error.
Because we handle both tuckpointing and concrete construction at Bald Eagle, we often get asked about the difference between mortar and concrete. Especially, can one be substituted for the other?
While it may seem like the only difference is how each is used, they each have their own very different properties; each specializing in its own area. Though both mortar and concrete are widely used building materials, they cannot be substituted for each other without compromising the integrity of a build.
So what is the difference between mortar and concrete?
Mortar
Mortar is used to hold building materials such as brick or stone together. It is composed of a thick mixture of water, sand, and cement. The water is used to hydrate the cement and hold the mix together. The water to cement ratio is higher in mortar than in concrete in order to form its bonding element. When mixed, it is a much thicker substance than concrete, making it ideal as a glue for building materials like brick. Because mortar must be replaced every 25-50 years, it isn't practical for structural projects.
Concrete
Like mortar, concrete is a mixture of sand, cement, and water, but it also contains rock chippings or gravel which makes it much stronger and more durable than mortar. Because it needs a low water to cement ratio, it is much thinner when mixed, making it difficult to use as a bonding element. Concrete is used in structural projects and is often reinforced with steel rebar to maintain its structural integrity as the soil beneath it settles. It is best used for support, such as beams, walls, or other building foundations.
So essentially, what is the difference between mortar and concrete? While a hydrated cement mixture forms the base of both materials, the rock chipping in cement makes it much stronger for use in structural projects, and mortar is thicker, which makes it a better bonding element.
Before you begin, know which material will be best for your project. Using one material in place of the other can create new costs in the long run for repair or replacement.
If you have questions regarding the use of mortar or concrete, call Bald Eagle Construction - {{ info:phonenumber }}
While bricks can last nearly a century, the mortar holding them together must be replaced several times during the life of the walls to prevent any damage. This common repair is called tuckpointing, and it can dramatically increase the life of your home’s façade.
What is tuckpointing?
Tuckpointing is the removal and replacement of the mortar between the bricks of your home. It is a labor intensive project that should be completed by an experienced mason. Proper tuckpointing in Chicago homes is imperative because harsh winter weather conditions can be hard on their exteriors.
Why is it important?
Tuckpointing in Chicago homes is an important part of upkeep and restoration, and a necessity in protecting the inside of your home from moisture. When mortar weakens, moisture can seep behind or break down stones causing water damage behind the wall. Replacing the mortar maintains the original appearance and strengthens the home’s structure while creating a relatively waterproof joint that extends the life of the walls.
When should you consider tuckpointing?
Though brick and mortar are substantial, they are not permanent structures. The mortar will need to be replaced every 25-30 years in order to prevent damage in the bricks themselves and behind walls. If you notice voids, water damage, or cracking and crumbling mortar, you should consider tuckpointing your home.
Testing for Damage
There is a simple test you can do to determine whether or not your facade is in need of repair. Take an object like a small screwdriver or key and run the edge of it along a mortar joint. If a white, powdery material is scraped off, your home is likely in need of repair. If you are ever unsure if your home needs repointing, you should call a masonry contractor for a consultation.
When is it too late to repair with tuckpointing?
Tuckpointing in Chicago homes is critical to their maintenance, and it is imperative that you contact an experienced mason if you believe your mortar needs to be replaced. When significant areas of brick or stone become loose, the only way to solve the problem is to tear down the old masonry and relay a new wall at a significantly higher cost than tuckpointing.
Outdoor living areas not only provide comfortable spaces for entertainment, they add value to your home. This area should include all the design details of an indoor space and the ability to withstand exposure to the elements. This makes concrete an excellent choice for creating the ultimate outdoor living space and Chicago concrete contractors can help you extend your living space across your property. Below are some key elements to consider for your outdoor projects:
Surfaces
Patios, walkways, and stairs will create the floor-plan and design for your outdoor project. Stained concrete adds depth and creates a beautiful contrast to your yard's natural elements. Add even more visual interest by accenting seating areas with versatile outdoor rugs.
Furniture
Once your floor-plan has been laid, add furniture for dining and lounging. Concrete can be used to build seat walls, couches, chaises, and other outdoor seating. Soften and highlight these lounging areas with colorful cushions and pillows.
Cooking
Having an outdoor kitchen area is great if you entertain often or if you just love to grill. Install concrete countertops and sinks for food preparation, and grills or brick pizza ovens for cooking. Concrete countertops are weather resistant and can be molded into any shape that fits your space. Coating the countertops and sinks with a sealant will protect against stains. If you entertain often, you can even build a concrete bar area for drink preparation.
Firepits
Use your outdoor area late into the evening by asking your Chicago concrete contractor to install wood- or gas-burning fireplace, firepits, or chimineas. These elements will keep you and your guests warm and create an intimate area for conversation.
Water Features
Create a relaxing, tranquil environment by adding waterfalls, ponds, and spas, or make a space for fun in the sun by adding a pools and fountains. Here in Chicago, concrete contractors often use faux rock for water feature construction. Concrete rocks can be made to replicate real rock formations and can be built onsite, which eliminates the expense of hauling materials in from other areas.
In a city where space it at a premium, the design and flow of your yard is vital to your ability to entertain and enjoy the outdoors. Chicago concrete contractors can help you determine the best way to utilize your space and achieve your perfect patio.
In Chicago, roofing usually lasts 10-20 years depending on the type of roofing used, though with the proper maintenance it can last several years longer. Eventually, however, you will have to replace your roof. Here are some signs that it's time for replacement:
Missing Granules.
While it is not unusual for some granules to fall off the shingles, excessive granule loss is an indication that it's time for a new roof. If asphalt or fiberglass peek through the gritty surface, it's time to contact a qualified roofing contractor.
Rotting.
Rotting is common when the organic material of the forming the core of your shingles begins to absorb moisture. When you repair or replace your roof, use shingles manufactured from non-organic compounds that resist moisture.
Buckling.
Buckling can occur for a number of reasons; poor ventilation, wrinkled underlaying, double-layered shingles, and improperly applied felt can all cause your shingles to buckle. If left untreated, the shingles will begin to crack and tear causing significant damage to the roof deck.
Ceiling Spots.
Wet spots or brown-ringed stains on your celing, this is probably the result of a leaking roof. Check the attic for the source of the leak, examining carefully since some leaks travel some distance from the actual source. Outside, check the chimney and other penetration points for cracks in the flashing and check for ice dams near the eaves that may cause the water puddle up. Finding the source of the leak is crucial to avoid the growth of black mold which poses a health risk to your and your family.
If you notice any of these problems, your roof could need to be replaced and you should contact a reputable Chicago roofing contractor. Make sure their work is guaranteed and ask for warranty information during your consultation.

