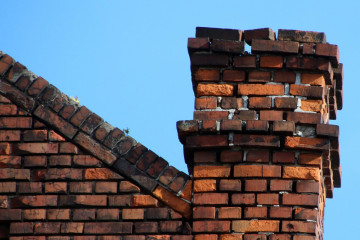
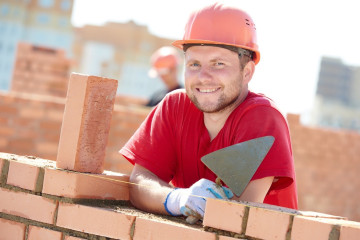
There are few features that look better on a house than a well-designed chimney - assuming the chimney’s well-maintained. That’s the good news. Since chimneys tend to be constructed of brick, maintenance is actually a pretty simple affair, and doesn’t have to be done too often.
But chimney repair does still have to be carried out occasionally.
Harsh weather can cause a lot of damage to mortar joints in any brickwork, especially chimneys. Over time, rain causes mortar to weaken and erode, while low temperatures during winter can cause freezing, and even cracking. To address this damage (and to prevent further damage) tuckpointing is the perfect solution.
A critical maintenance task on any structure that incorporates brickwork, tuckpointing involves removing and replacing weakened or damaged masonry. This strengthens the connections between the bricks in a chimney, while also sealing them against potential water damage. By combining tuckpointing with the laying of additional bricks, you accomplish a few things:
You restore the structural integrity of the chimney.
You stop further corrosion of the mortar joints.
You prevent water from entering the chimney system, ensuring its easier to maintain the fireplace.
You restore the chimney’s masonry to its original state, through a process that’s much more cost-effective than a complete tear-down and rebuild.
Now, at this point it’s worth mentioning that tuckpointing is a complex process - if you’re set on doing it yourself, check out our step-by-step guide, and bear in mind that chimney tuckpointing involves a few additional challenges:
It’s advisable that you sweep your chimney out before performing the tuckpointing procedure. Though there are specialized tools for this purpose, it can still be quite difficult.
Rather than working on flat, solid ground, you’ll be on your roof - there’s the constant risk of injury through falling.
As opposed to a brick wall, a chimney is a far more challenging tuckpointing project, with tight corners and likely irregularly-shaped sections.
You can try to tackle this yourself - but you don’t need to. With Bald Eagle Construction, you’ll have one of the best contractors in the Chicago area at your side. No matter what’s happened to your chimney, it’ll be good as new once we’re done. Give us a shout today for a free consultation!
You are here:
Home >
Blog
Tips for Chicago Homeowners
With over 20 years experience we've established significant knowledge in home maintenance. We want to share that knowledge with homeowners to make it easy for them to take care of their properties.
About Bald Eagle Construction

Our goal is to bring quality materials, experience and professionalism together and complete every project in a timely manner at a fair and competitive price.
Kevin Wood – Owner, Bald Eagle Construction
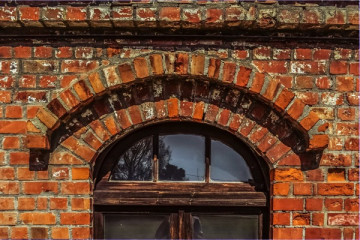
When it comes to repairing brick mortar on one of your properties, one of the most frequent problem areas is around window frames. There are a few reasons why tuckpointing windows is more difficult than tuckpointing walls. Firstly, the difference in temperature and moisture around the window frame is likely to be far more pronounced than it would be elsewhere - you’ve got heat drifting outside during winter, and air conditioning during the summer. Secondly, insufficient propping during window replacement can cause damage to brickwork. Poorly-installed windows can cause just as much harm. Inadequate window bearings, too much weight, or a lack of proper supports can cause issues in your mortar joints. Finally, improper cleaning of mortar droppings around window sills can be an issue during the tuckpointing process. Last but certainly not least is one of the most frequent mistakes made by tuckpointing novices. Mortar won't bond properly to wood or paint; even with a properly-installed frame. Mortar only bonds well with stone and brickwork. To fit everything together correctly, you need to apply caulking between brick and window casings. Exclude the caulking, and you’ll be left with weak, failure-prone joints around your window. You’ll likely also end up with a gap that will cause water infiltration (and eventual cracking). Fortunately, applying caulk isn’t terribly difficult:
First, identify how many windows need caulking - this will help you preemptively determine the supplies you’ll have to purchase.
Figure out what kind of caulk you need. In this case, your best option is polyurethane caulk. It can adhere readily to wood, metal, and stone alike. You’ll also want to purchase some paint since polyurethane caulk can break down in sunlight.
Purchase a caulking gun. You can find one at any local hardware store.
If there’s any old caulk or mortar rubble around the window frame, remove it before beginning your job.
Repair any structural damage to the frame.
After placing your caulking tube into the gun, cut the tip of it at about a 45-degree angle. Use a nail or something to that effect to break the inner seal.
Press the tip of your caulk gun firmly against a corner of the window, and then caulk in a straight line to another corner. Repeat this three more times.
Remove excess caulk, and allow the caulk you’ve applied to dry for twenty-four hours or more.
Of course, if you’d prefer not to handle it on your own, Bald Eagle Construction’s got you covered. We’re one of the best tuckpointing contractors in the Chicago area, with years of experience on tuckpointing projects of all sizes. Give us a shout for a free consultation, and we’ll get your walls looking good as new!
Any real estate professional knows that when it comes to selling a property, a positive first impression makes all the difference in the world. When it comes to property value, curb appeal is essential in making a sale. Now there's research to back that up. When prospective buyers view a property, the majority (43.1%) decide whether or not to make an offer within the first five minutes of viewing. Of that number, the decision-making process of more than 20% involves how the walls on the exterior of the property look. If they're old-fashioned or in poor shape, they will turn a lot of people off. Brick is neither. It stays visually appealing no matter its age. Unfortunately, when you paint it, that’s a whole other story. While there are some examples of painted brick done right, in the majority of cases, painted brick is time-consuming to maintain, and the difficulties involved in painting a brick wall are myriad. Here are just a few of the things that can go wrong:
If you don’t use the correct paint, you’ll see a lot of deterioration. Moisture will eventually work under the paint, causing disintegration which both destroys visual appeal and can lead to long-term structural problems.
Failure to remove crumbling particles and replace damaged sections of brick before painting may be visible in the finished project. You’ll see uneven or bubbling paint.
Even when done correctly, most cases of painted brick require a fresh coat of paint every year to maintain their appearance.
Basically, unless you (or your property’s original owner) did the job right when painting the property’s exterior, painted brick is more trouble than it’s worth to maintain. But restoring it is no picnic, either. If you’re committed to doing it yourself, here's an overview of the process of stripping and restoring the wall:
Brush off the crumbling particles and scrape off the paint in areas where it’s peeling and crumbling first. Do not consider sandblasting under any circumstances - it can and will cause permanent structural damage to your property.
Check to see how much the brick has deteriorated. If the deterioration is extensive, you may need to pre-emptively tuckpoint the brick.
Scrub the wall with a strong cleaning solution such as trisodium phosphate and chlorine bleach. Rinse it thoroughly, and allow it to dry before taking any additional steps.
At this point, you have a decision to make - you can try to re-paint the wall, or you can try to restore it to its original appearance. If you choose the latter, you'll need to purchase a chemical paint remover designed for masonry surfaces. Test the remover on a small, inconspicuous area before doing anything else.
Clean the entire wall, taking care to remove all the paint.
Carry out the necessary repairs - depending on the extensiveness of the damage, you may well need to replace large portions of the wall.
Not exactly a simple process. Even though brick restoration has a big payoff, it’s not something you should tackle on your own. If you need to restore painted brick, call Bald Eagle Construction at {{ info:phonenumber }} for a free estimate.
Before you hire a concrete contractor to work on your property, you need to find the right crew for the job. This list of questions will help ensure that you do. Whether you need to replace a damaged, cracked sidewalk or install a new driveway, working with concrete can be difficult and time-consuming. As with any other home construction project, trying to do it yourself could wind up costing you more in the long run than springing for a contractor from the start. Of course, in that same vein, hiring the wrong contractor can cost you even more. Here are a few questions you can ask your concrete contractor before hiring them to ensure you don’t.
What Are Your Certifications?
If your contractor doesn’t know what MCAA is or doesn’t hold a general contractor’s license, it’s in your best interest to walk away. A license proofs that the contractor has met industry training standards, and - in some cases - is legally allowed to perform work in your region. Consequently, an unlicensed contractor may be unaware of building codes or may not care about ensuring the necessary permits are applied.
May I See Proof of Insurance?
A contractor should carry two types of insurance - liability and worker’s compensation. For the former, that means that if something happens to your property as a direct result of the contractor’s actions, you won’t be required to shell out for repairs. For the latter, that means that if a worker is injured on your property, you should be safe from a lawsuit.
Can I See A Few Client References?
When contractors do good work, they receive praise for it. They leave satisfied customers behind - customers who are more than willing to recommend them to others. That’s why you should be wary of anyone who’s unable or unwilling to provide you with client references. It means either they’re brand new to the industry or don’t have any satisfied customers. Either way, you may want to think twice before doing business with them.
How Much Do You Estimate This Project Will Cost, And What Is Your Payment Schedule?
If you’ve decided to hire a contractor, this is the next question you should ask them. Contractors should be able to approximate how much money will be required to complete a project, and generally, they’ll accept a deposit when they start the project, and the remainder upon completion of the job. If a contractor asks for full payment upfront, it should raise a red flag.
What Expenses Does Your Quote Include?
Will you be responsible for purchasing gravel? Who will handle the cost of the concrete? Not every contractor will cover material costs, so it’s essential to establish this at the start.
When Do You Expect This Project To Be Completed?
As with cost, most contractors should be able to give you a general idea of how long a particular construction project will require. Do your research here - check how long similar projects usually cost. A contractor who makes a promise that’s too good to be true is just as much an issue as one that gives way too liberal an estimation.
How Should I Prepare My Property For Your Crew?
Make sure you’re aware of your responsibilities before a project begins. Will you need to clear space for the crew’s materials? Will you need to ensure family and pets steer clear of the site before work begins? Will you need to move your vehicle elsewhere?
Once You Begin My Project, Will Your Crew Stay On To Completion?
Not every contractor handles the work alone. Some will subcontract out to a third party. Subcontracting a standard practice and isn't a bad thing, but you should be aware of it you sign anything.
At The End Of Each Day, Will The Worksite Be Left In A Clean And Tidy Manner?
Most contractors should answer ‘yes’ to this question. There are few things more frustrating than having piles of concrete bricks or rubble obscuring your property, after all.
Who Will Handle Demolition and Removal?
Will your contractor do this themselves, or outsource it? Will they get rid of any materials at the end of a project, or will that be your responsibility?
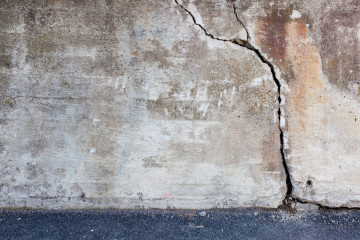
Whether it's roads, driveways, sidewalks, or parking slabs, eventually, almost every kind of concrete cracks. It’s an inevitable element of the wear and tear suffered by a property - the same as paint peeling, garden plants dying, or walls getting dirty. Whether or not cracked concrete is a serious problem or just a cosmetic flaw depends on the type and location of crack. Let's look at some of the different ways concrete can break down.
Why Is My Concrete Cracked?
Plastic Shrinkage
Concrete in its non-solid state is basically just water and cement. As it hardens and the water evaporates, it shrinks. Too much water means too much shrinkage - and too much shrinkage leads to cracks in the finished project. This is usually a cosmetic flaw rather than a structural one. At the same time, if you want to avoid it, make sure you stick with the ratio of .5 - that means that for every pound or kilogram of cement, use half a pound or kilogram of water. If you want to use less, you can also add a plasticizer.
Expansion & Contraction
Like every solid, concrete tends to change subtly in shape and size based on weather conditions. Hot weather will see your concrete slab expand, pushing against anything in its path as it does so. If it meets an object that doesn’t flex or give during that expansion, it will likely crack. Unfortunately, aside from planning for this expansion, there’s not a whole lot you can do about this one. You’ll just need to repair the crack when the time comes.
Heaving & Settling
Generally speaking, ground movement is one of the most frequent causes of cracking, especially with sidewalks, driveways, and roads. The growth of a tree’s roots or an excessive freeze and thaw cycle can cause the ground to push upwards on the concrete, causing it to crack and break - a process known as heaving. Consequently, shifting in soil due to water or the rotting away of a tree’s roots cause the foundation of concrete to collapse - this is known as settling. As with expansion and contraction, heaving & settling is likely to occur over time.
Overload
If too much weight is placed on concrete, it can alter the ground beneath the slab, or simply break the slab itself. Make sure you’re aware of how much weight your sidewalk and driveway can handle. Otherwise, you might see pressure cracks or breakage.
Improper Drying
Last but certainly not least, crazing and crusting occur when laid concrete is improperly dried. The former results from concrete not having enough moisture or losing moisture too quickly, while the latter results from a pattern being pressed into concrete before it’s properly dried. Both crazing and crusting are entirely cosmetic - easily repaired and easily avoided.
When Should I Be Worried About Cracking?
Generally, cracked concrete is cosmetic unless it occurs in a supporting structure (such as a cement pillar) or it water gets into a crack when freezing occurs. Concrete that’s completely broken is also an issue in a sidewalk or driveway, as it can cause damage to a vehicle or injury.
How Do I Fix Cracked Concrete?
There are ways to repair some specific cases of cracked concrete, but in almost all cases your best bet is to call in professionals. We are able to assess the specific issues that caused your cracking and determine whether your best course of action is repair or replacement.
Roofs usually last 12-20 years and can be expensive to replace. But planning, estimating, and researching can help you determine the cost and save some cash. So, how much does a roof cost? There are many factors that impact the cost of your building project. Here are some tips for figuring the price of replacement.
Preparation is necessary before the new roof can be added. Removal of shingles and inspection of existing plywood and flashing will factor into the cost. If your chimney or other existing brickwork will need tuckpointing can also be a factor.
Materials don't always have to be expensive, but they can be costly. You'll need plywood, nails, shingles, and roofing cement, and could also require things like flashing, mortar, brackets for solar panels or other roof attachments. Don't forget to plan for labor costs (usually about three days for an average roof).
The pitch of the roof will also affect the cost; the higher the pitch of the roof, the higher the cost. Contractors must add harnesses or other special equipment to the quote. Gable roofs are the easiest, since they have the smallest slant.
You'll need to determine the type of roofing that will be used. Terracotta tiles are more expensive not only because of the material, but because they require specialized knowledge.
Things like skylights, solar panels, and other roof attachments can add to the cost of replacing your roof. These should be mentioned during the initial talk with your local roofing contractor.
Do you need to remove your roof? This is likely if your roof is damaged by weather, water leaks, natural disasters, extreme age, or other factors. Sometimes, replacing the roofing is necessary if you're changing shingle types. For instance, if you're switching from wooden shingles to asphalt, you'll need to remove the existing roof.
If your roof was damaged by a storm or natural disaster, check your insurance policy to see what, if anything, can be paid by your provider. This could potentially save you thousands of dollars.
Your local government may require permits, licenses, or other paperwork that can cost $100s of dollars. This information will be available through your local building inspector.
Most quotes are determined using square footage and is calculated based on a 10x10 square. You can calculate the size of your roof by taking the square foot of your roof and adding half. So if your home is 2,500 square feet, your roof size should be roughly 3, 750 square feet.
It’s a common mistake made by countless home repair novices - improper maintenance of brickwork. The idea seems to be that because brickwork is a lot more durable and requires less maintenance than, say, wood paneling, it can just be left alone. The reality couldn’t be further from the truth.
While the bricks themselves tend to last for a very long time (more than a century, and thats a conservative estimate), the mortar that holds them together is another story altogether. Due to wear and tear from wind, rain, and snow, brick mortar tends to wear down over time. It tends to weaken, crack, and fall away. If you let mortar deteriorate without bothering to repair it, moisture will eventually seep between the bricks of your wall. Left long enough it can damage the inside of your home, and cause severe damage to the bricks in the wall. Thats why tuckpointing is crucial. Tuckpointing is the process of removing and replacing old mortar in your brickwork. By tuckpointing regularly you seal off any potential entry points for unwanted moisture, protecting both your wall and your home from damage. Tuckpointing isnt exactly an easy project, though. Its complicated, precise, and labor-intensive. Its not, in other words, the sort of thing you want to do annually.
So how often should you tuckpoint?
Honestly, it depends. While as a general rule youll want to replace the mortar in your wall every twenty-five to thirty years, if your home is in a wetter climate or a region with severe weather, (both of which apply to Chicago), youll want to do it much more often. Similarly, if you live in a climate thats typically dry or arid, you can probably get away with less frequency. The quality of your last tuckpointing job also plays a huge role. If you hired a professional contractor who used a high-quality mortar and did everything perfectly, you won't need to do it again for at least a few decades. If your last tuckpointing job used shoddy products or craftsmanship, you might need to repoint it much sooner - possibly even right away. For best results, you should probably rely on a professional here, unless youre exceedingly confident in your tuckpointing abilities. Better to spend a little money and save the time and headache of potentially ruining your brick, right? That’s where Bald Eagle Construction comes in. We’re Chicago’s leading residential construction contractor, and brickwork is something we know like the back of our hands. More importantly, we care more about our customers than our payday. Bring us in, and we’ll make sure your tuckpointing project is done to perfection, no matter what it involves.
Brickwork looks great when it’s well-maintained. Unfortunately, in a lot of older properties it isn’t. Restoring old brick improves curbside appeal, and keeps you building in good condition. It can also help increase resale value of older buildings. If your vintage brick building is looking run down and needs some attention, you’ll want to restore the brickwork. That’s no easy task, though. Before you get all gung-ho and dive into a tuckpointing project, here are a few pointers for you.
Do: Make Sure You’ve Got The Right Tools
Check out our guide on how to repair brick mortar, and make sure you’ve got every tool we recommend there. Do this before you set to work on your project. Trust me - it’s better to get all the planning out of the way first.
Don’t: Try To “Macguyver” The Job
If you lack the necessary tools for a job, don’t do the job. Sure, you might be able to bumble your way through. But likelier than not, you’ll end up with a damaged wall, and your restoration will have to be a repair. Don't be afraid to hire a professional tuckpointing contractor.
Do: Research What Your Brickwork’s Actually Made Of
Different brick structures are made of different materials - and require a different approach. See if you can look up a little history on your home, and try to find out what yours is made of. You need to make sure that any mortar and bricks you add to the wall are compatible with the old stuff.
Don’t: Sandblast.
When clearing old paint off masonry, it can be tempting to just use sandblasting - after all, it works for concrete, right? Thing is, sandblasting is actually one of the worst things you can do to brickwork. It can destroy the bricks and cause irreversible damage.
Don’t: Use High-Pressure Spray
Similar to sandblasting, high-pressure sprayers can cause some damage to your masonry. Not only that, they can push cleaning chemicals so far into the brick that they can’t be rinsed out. Your masonry will end up stained.
Do: Use Masonry Cleaner
The first thing you’re going to want to do is ensure your masonry is clean. That involves more than just soap and water. Most masonry companies sell specialized cleaning products - purchase from them. Don’t simply wander to your hardware store and trust the word of a salesperson with only slim knowledge of brickwork.
Don’t: Just Throw Waterproof Coating On Everything
Waterproofing is important in small doses - but applied too liberally, it can actually do more harm than good. This is especially true in brick restoration scenarios where novice homeowners think it’s a solution for aging masonry. It isn’t - waterproofing everything will just end up trapping water inside your masonry.
Do: Test Your Products Before You Use Them
Whether you’re testing masonry cleaner or trying to figure out if a type of masonry mix is a good fit for your brickwork, choose a few small areas of your wall and do a spot test. Make sure they’re inconspicuous. If a chemical you’re using turns your bricks a horrible shade of brown, you want to make sure you use it in an out-of-the-way location, first.
Do: Start Small
Tuckpointing is hard work. Don’t try to boil the ocean off the start. If you think a project might be too much work for you, trust your instincts. Don’t bite off more than you can chew.
Don’t: Do Anything Unnecessary
Last but certainly not least...you don’t need to reinvent the wheel here. If you set out to restore your bricks, just restore your bricks. Once you’ve got that project out of the way, you can start on that new gazebo you envisioned, or that expansion you’re itching to add.
Wouldn’t it be nice if we could handle everything ourselves? If we had the necessary technical knowledge to do everything from electrical work, to car repairs, to tuckpointing? There’d be no need for contractors or mechanics, and everyone would save a ton of money. Unfortunately, the real world doesn’t work that way. While it’s true that you can save money by tackling a home construction project by yourself, that doesn’t mean that you will. Put another way, just because you can replace, repair, or install brickwork yourself, doesn’t mean you should.
Sure, you might save some money by sacrificing your own time. But there’s an equal chance that if you aren’t an expert, you might cause structural damage or install something improperly. And in the long run, that will cost you far more than simply hiring someone to handle it for you. Let’s use your car as an example. Imagine you’ve no expertise or awareness of how its engine works. One day, while you’re on your way to work, it breaks down due to a minor fault in the water pump. “No problem,” you say to yourself. “I’ll just pull out the instruction manual and look up a few guides online. How hard can it be?” Four days and countless hours of frustration later, and it’s no longer just a water pump you need to replace. As a result of your fumbling, your whole engine is gone. Suddenly, instead of paying a few hundred at the mechanic, you’re paying a few thousand.
Common DIY Tuckpointing Mistakes
Granted, tuckpointing is a bit less complicated than engine repair. But there’s still a ton of stuff you can do wrong, including…
Using improper mortar. This is probably the costliest mistake you can make - because it can actually end up causing more damage to your property than if you’d just left it alone.
Not installing the flashing properly. This can cause water and moisture buildup, damaging your entire wall.
Only repairing surface issues, rather than the source of the problem. With an inexpert eye, you might only identify a few cosmetic problems - leaving the underlying cause completely unaddressed.
Failure to clean before performing the repairs. Without proper cleaning, the new masonry you install won’t set properly - it’ll just fall away.
Installing bricks unevenly. On a smaller scale, this can be a cosmetic problem. On a large one, it can actually undercut the structural integrity of an entire property.
Basically, unless you’re willing to put in a ton of hours and do a ton of research to ensure you do everything right, tuckpointing on your own is probably a bad idea. Luckily, you don’t have to - you can hire someone like Bald Eagle Construction to do it for you. As Chicago’s leading residential construction contractor, we’ve extensive expertise, superior customer service, unimpeachable integrity, and excellent prices.
If you need to hire a contractor to do tuckpointing work these questions will help you decide if who's qualified to work on your home or business.
Not everyone has the time or skill to do tuckpointing work on their own. Fortunately, there are plenty of contractors out there who are both willing and capable of doing the job for you. Trouble is, not all contractors are created equal.
If you’re not careful about who you hire, you could wind up with damaged masonry, shoddy brickwork, a fistful of regrets, and an empty wallet. Here are a few important questions to help you decide who's qualified to handle your tuckpointing work and prevent that from happening.
Important Questions To Ask A Tuckpointing Contractor before you hire them.
What certifications do you hold?
Does your contractor know what the MCAA is? Do they hold a general contractor’s license? A tuckpointing contractor who’s unlicensed is probably one you don’t want to allow anywhere near your brickwork.
Do you have proof of insurance?
What happens if your contractor messes something up? What happens if they cause damage to the property, or an injury occurs during work? You don’t want to foot the bill for stuff like that, so before you allow work to begin, you need to demand to see proof of insurance.
What sort of payment schedule do you work to?
This is a pretty basic question, but one you should get out of the way sooner rather than later. Usually, most contractors will work on a system where they take half their payment when work begins, then the rest after they’ve finished. Be extremely wary of anyone who demands a full payment upfront.
Do you have experience working with tuckpointing?
Again, this is a basic question you should ask every contractor. While it’s certainly true that someone could easily lie on this one, asking this question with context from the others can help you distinguish the professionals from the shysters.
May I see some client references?
Any contractor worth their salt will have a set of client references to show you. If they don’t - or they refuse to put you in touch with any of their previous clients - it means they’re either completely new or their clients don’t have anything positive to say. Either way, they’re probably someone you should avoid.
How should I prepare my property for your work?
This one’s more a general housekeeping matter - preparing for the work beforehand will help it go more smoothly.
Who is responsible for material costs?
Self-explanatory. Some contractors will handle material cost for you - those are generally the ones you should work with.
When do you expect to complete the work?
Usually, a good contractor won’t give an exact deadline. They’ll give a general timeframe.
Will you clean up after the project is finished?
Most contractors should respond with an immediate ‘yes’ to this one. If they don't, you'll probably want to contact someone else.
If you're not satisfied with the responses you've gotten from other contractors, call Bald Eagle for a quote today {{ info:phonenumber }}.

